
Moving a Queen Ant to a Formicarium
A calm, low-stress method for moving a queen and young colony from a test tube into their first proper nest.
Moving ants into a formicarium should feel almost disappointingly uneventful. If it looks dramatic, something has probably gone wrong. The best moves are slow, voluntary and controlled.
This guide is for moving a queen with workers from a founding tube into a first nest. If you have a queen with no workers, stop. In most cases she should stay in the test tube.
Quick answer
Prepare a small, suitable formicarium, hydrate it correctly, make it dark, connect the test tube securely, and let the colony move voluntarily. Keep the old tube available until queen, brood and workers have all moved.
Before you start
- confirm the colony is ready to upgrade
- choose a nest that is not too large
- test every lid, port and tube connection
- hydrate the nest before connecting
- darken the new nesting chamber
- apply escape barriers before workers explore
- prepare a catch cup, cotton and spare tubing
If you are not sure whether the colony is ready, read the Formicarium Upgrade Guide first. It is better to be slightly late than dramatically early.
The safest method: connect and wait
- Place the formicarium and outworld in their final location.
- Hydrate the nest according to its design.
- Darken the nest chamber.
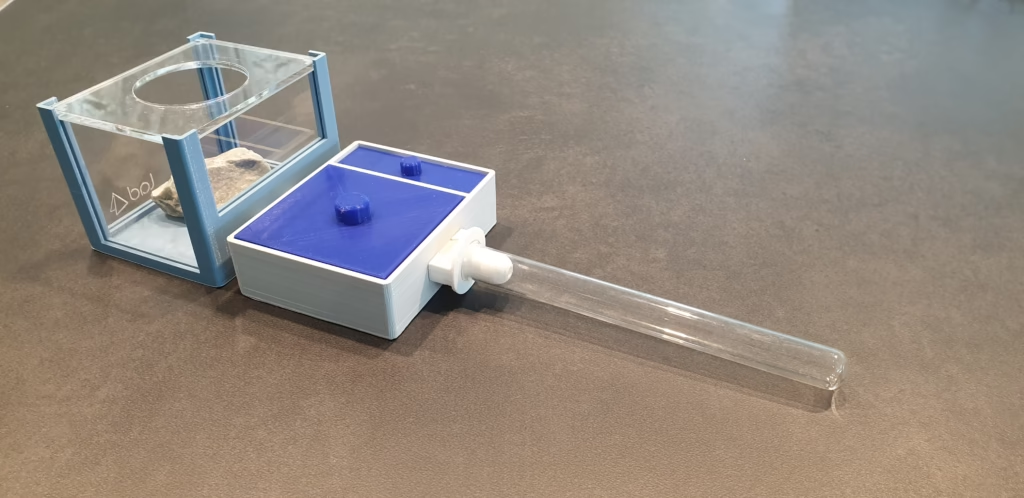
- Connect the test tube to the outworld or nest entrance.
- Keep the old tube accessible and stable.
- Feed lightly in the outworld if the colony already feeds well.
- Wait for workers to explore and move brood.
- Disconnect the old tube only when the move is clearly complete.
This can take minutes, hours, days or longer. Ants are not reading your project timeline.
How to encourage the move safely
- Make the new nest dark.
- Keep the new nest correctly hydrated.
- Expose the old tube to normal room light, not heat.
- Keep vibrations low.
- Do not flood the old tube to force movement.
- Do not blast heat at the old tube.
If the ants refuse to move, assume the new nest is not better yet. It may be too dry, too wet, too bright, too large, too exposed or smell strange from manufacturing/cleaning.
What if only workers move?
That is normal. Workers often investigate first. The move is not complete until the queen and brood move. Do not remove the old tube just because some workers are partying in the new outworld.
What if the queen moves but brood stays behind?
Wait if the old tube is safe. Workers may move brood gradually. If the old tube is unsafe, you may need careful intervention, but avoid rough tapping unless there is a genuine emergency.
Species differences matter
Different ants move differently. Large calm species may take their sweet time. Tiny species may explore quickly and test every gap. Stinging species should be moved with extra containment and longer tools. Semi-claustral or highly active species may need more careful feeding access during the move.
After they settle
- Keep the nest dark for several days.
- Feed small portions, not a buffet.
- Watch humidity without overwatering.
- Check barriers daily at first.
- Remove old food and dead insects quickly.
- Avoid moving the setup again straight away.
Common mistakes
- Dumping the colony in: stressful and risky.
- Using a nest that is too large: creates waste and humidity problems.
- No escape barrier: especially bad with small workers.
- Removing the tube early: brood or workers can be left behind.
- Changing heat, food and nest all at once: too many variables.
- Using panic as a care strategy: famously unreliable.
Related guides
- Formicarium Upgrade Guide
- Ant Nests 101
- Ant Barrier Guide
- Ant Feeding Guide
- Mould in an Ant Nest
- Beginner Ant Keeping Mistakes
Bottom line
The safest formicarium move is voluntary. Prepare a genuinely better nest, connect it securely, make it dark and comfortable, then let the colony decide. Slow is smooth; smooth is alive.