Breeding mealworms at home gives ant keepers a cheap, controllable protein source and lets you match feeder size and nutrition to your colony. This guide covers practical setup, staggered production, Australian biosecurity tips and troubleshooting — including a quick feeding‑size table so you can safely feed the right mealworm preparation to the right ants.
Breeding mealworms — quick reference
| Stage | Target | Notes |
| Breeding temp | 24–28 °C | Fastest development; increase to 26–28 °C to speed up slow tubs |
| Moderate growth | 20–22 °C | Slower timing for planned harvests |
| Storage/hold | 4–8 °C (short term) | Slows metabolism — don’t store for months |
| Relative humidity | 40–60% RH | Avoid prolonged >70% (mould/mites) or <30% (desiccation) |
| Turnover | Replace veg every 2–3 days; sift frass weekly–fortnightly | Observe and adjust to your local room conditions |
1. Why bother breeding mealworms?
- Control: timing and size for feeding, plus gut‑loading before use.
- Cost & space efficient: a few tubs on a shelf will supply most hobby colonies.
- Stagger life stages: maintain larvae, pupae and beetles so you never run out.
2. Starter kit — what you’ll actually need
- Starter culture: 500–1,000 mealworms (mix of larvae and beetles) from a reputable local reptile shop or feeder breeder — ask about pesticide use and recent health.
- Container: Smooth‑sided plastic tubs (HDPE/PP) or shallow drawers; 10 cm depth is helpful for pupation.
- Ventilation & lid: Fine metal mesh (~1 mm) over ventilation holes and a snug lid. See our escape‑proofing lids and barrier ideas — beetles are surprisingly good climbers.
- Bedding: Wheat or oat bran, 3–5 cm depth; sift and top up rather than totally replace where possible.
- Moisture: Carrot, potato or apple pieces on cardboard or a shallow lid; replace every 2–3 days.
- Tools: Coarse sieve for sifting frass, small trays for pupae, basic thermometer/hygrometer and dedicated utensils.
3. Quarantine and Australian biosecurity checklist
Quarantine new mealworms for 7–14 days in a separate room. Look for mites, dead beetles or unusual smells. Freeze‑dry new bedding (bran/oats) for 48 hours to kill hitchhiker eggs before use. Keep dedicated tools and wash hands between tubs.
- Freeze new dry goods for 48 hours to reduce pest eggs.
- Keep mealworm tubs away from active ant workspaces to avoid accidental introductions.
- Discard heavily infested substrate; transfer healthy animals to clean tubs.
- Check DAFF guidance if you’re importing live insects or materials: DAFF Biosecurity.
For a deeper dive on mite prevention see our Preventing Mites guide.
4. Set up step‑by‑step (quick photo/infographic guide)

- Clean tub: smooth walls, dry, add 3–5 cm of bran.
- Add stock: larvae plus a handful of beetles; for tight control use a separate breeder tub for beetles.
- Moisture food: carrot or potato on cardboard or a yoghurt lid; swap every 2–3 days.
- Ventilation & lid: mesh over holes and a snug lid to stop escapes.
- Placement: stable 24–28 °C for fast growth; avoid direct sun.
Tip: sift tubs every 1–2 weeks — it keeps frass down and makes pupae easier to spot and move.
5. Life cycle & timing (use this to plan harvests)
- Egg: 4–19 days (tiny).
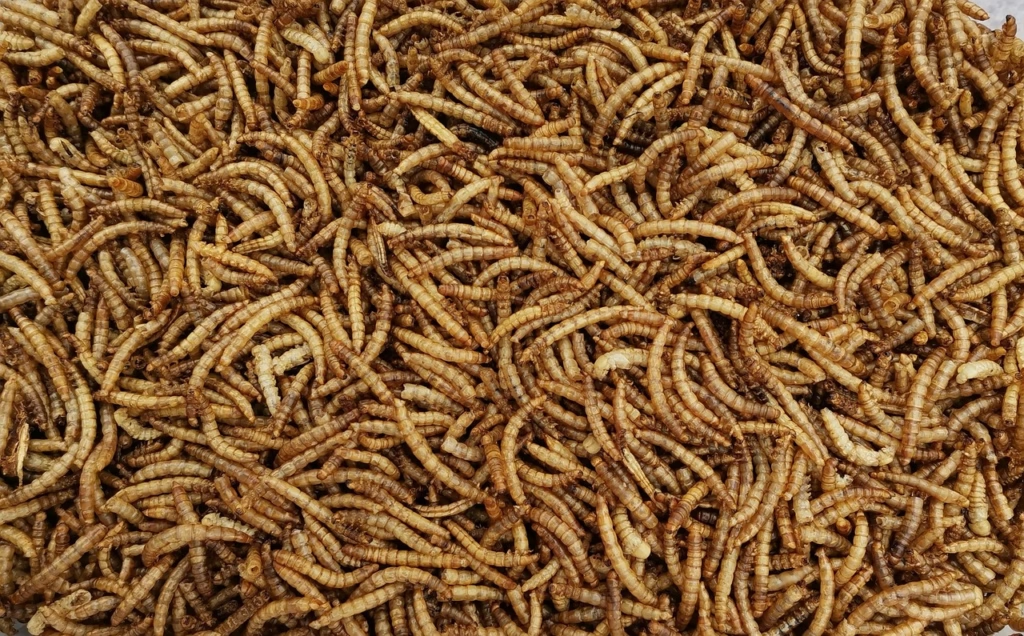
- Larva: 8–12 weeks at 24–28 °C (the main feeder stage).
- Pupa: 1–3 weeks; move to a nursery tray if you want beetles.
- Beetle: Lives 1–3 months; lays eggs after ~1–2 weeks.
Separate breeder, grow‑on and nursery tubs if you can — it simplifies staggered harvesting and protects breeders from hungry larvae.
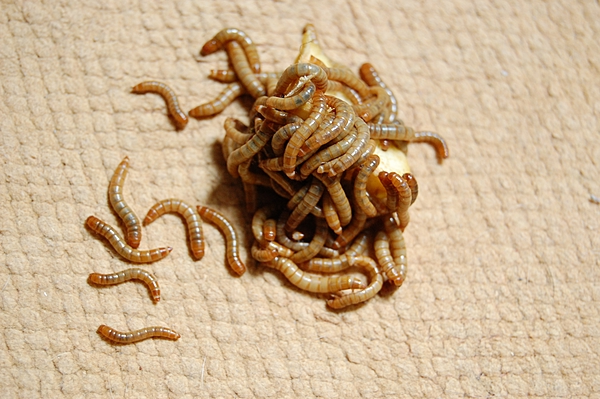
6. Feeding presentation — at‑a‑glance table for Australian ant sizes
| Ant size / group | Recommended mealworm presentation | Reason / notes |
| Tiny workers (eg. Pheidole minors, small Monomorium) | Diced 2–5 mm or mashed pre‑killed pieces | Too small to carry whole larvae; diced pieces allow trophallaxis |
| Small/medium workers (eg. small Camponotus, many Iridomyrmex) | Diced 5–10 mm or small whole pre‑killed larvae | Manageable pieces; pre‑kill to avoid burrowing/escape |
| Large workers (eg. Myrmecia, large Camponotus) | Whole live or pre‑killed larvae (live only if confident) | Can capture live prey; pre‑killed is cleaner and safer |
| Tiny specialists (eg. recently founded colonies) | Fruit flies or powdered diets instead of mealworms | Even diced mealworms can be too big for founding workers |
For species‑specific guidance see our care pages — for example the Big‑Headed Ant (Pheidole) and several Myrmecia guides linked from our species list.
7. Preparing mealworms for feeding (gut‑load & kill)
- Gut‑load: 24 hours on carrots, leafy greens or quality fish flakes to boost nutrition before feeding your ants; more details in our Ant Feeding Guide.
- Pre‑kill: Freeze live mealworms for at least 24 hours to kill/stun — 24 hours is enough for larvae; for bedding or dry goods you want to freeze for 48 hours to reduce eggs.
- Serve: Thaw and dice for small species, serve whole or halved for bigger workers. Use a shallow dish to reduce escapes when offering live prey.
8. Harvest calendar — sample staggered schedule
Use three tubs (breeder, grow‑on, nursery) rotated every 3–4 weeks to maintain steady supply. Example monthly rhythm:
- Week 1: Move newly emerged beetles to breeder tub (eggs laid in breeder).
- Week 3: Move large larvae to grow‑on tub for finishing.
- Week 6: Move pupae to nursery tray; transfer emerged beetles to breeder.
- Ongoing: Harvest larvae from grow‑on every 2–4 weeks depending on colony needs.
Keep a simple log with dates, temps and major actions — it’s the easiest way to predict a reliable harvest.
9. Troubleshooting & mite remediation checklist (step‑by‑step)
Most problems arise from moisture imbalance, poor hygiene or new contaminated stock. Below is an actionable mite remediation checklist — use early.
- Isolate: Quarantine the affected tub(s) immediately to stop spread.
- Assess: Are mites visible (tiny, fast specks), or is it just dust/frass? Check under veg and in corners.
- Remove healthy animals: Using a clean, dry sieve or soft brush, transfer healthy larvae and beetles to a sterilised spare tub with fresh bran.
- Discard contaminated substrate: Seal and bin old substrate and contaminated tools (or freeze them for 72 hours before disposing).
- Clean & dry: Wash tubs in hot soapy water, rinse and dry completely. Surface‑sterilise lids and tools if practical.
- Reduce humidity & improve airflow: Dry bedding slightly and move tubs to a less humid location; minimise soggy veg contact.
- Prevent re‑introduction: Freeze new dry goods for 48 hours and keep dedicated utensils for mealworm work.
- Monitor: Check quarantined animals daily for a week. If mites persist, repeat transfer and cleaning steps.
For broader prevention and long‑term strategies see our full Preventing Mites guide.
10. Common problems & short fixes
- Mould: Remove rotten veg, increase airflow and replace bedding if needed.
- Slow growth: Raise temperature to 26–28 °C and ensure a small protein boost (fish flakes) while avoiding fouling.
- Escapes: Smooth any textured walls, check lid seal and mesh, and move tubs away from ant benches — see escape‑proofing.
- Bad odour: Sift frass and remove rotten food immediately — odour is often the earliest sign of trouble.
11. Disposal, safety & Australian legal notes
- Do not release beetles or larvae into the environment — dispose by freezing sealed bags and placing in general waste.
- Check DAFF biosecurity if importing live insects or materials: DAFF Biosecurity.
- Avoid feeding ants mealworms reared on pesticide‑treated food.
- If you’re dust‑sensitive, wear a mask when sifting frass and wash hands after handling.
12. Alternatives and when to choose them
Mealworms are versatile, but consider:
- Superworms (Zophobas morio): Larger, good for big predators but harder to store cold.
- Black soldier fly larvae (BSFL): High moisture/protein — strong nutrient boost but different husbandry.
- Crickets / roaches / fruit flies: Use fruit flies for tiny colonies; crickets for active live‑hunting species.
13. FAQs (useful search snippets)
How long do I need to freeze mealworms to kill them?
Freeze live mealworms for at least 24 hours to kill/stun larvae. For dry goods (bran/oats) and to reduce eggs/hitchhikers, freeze for 48–72 hours where practical.
How long can I store live mealworms in the fridge?
Short‑term holding at 4–8 °C will slow them for a few weeks, but prolonged cold increases mortality. Use refrigeration only to pause production briefly.
Can I feed live mealworms to small ant colonies?
No — small workers struggle with whole larvae. Dice or pre‑kill for small species; use fruit flies or powdered diets for founding colonies.
What temperature is best for fast breeding?
24–28 °C gives fastest development; 26–28 °C speeds up slow tubs. For planning, 20–22 °C is useful to slow maturation.
14. Further reading & related guides
For feeding technique and gut‑loading strategies see our Ant Feeding Guide. If you’re new to species selection, our Best Australian Ant Species for Beginners page can help match colony size to feeder choices. When you’re ready to move a queen from founding stages into a nest, the moving‑to‑formicarium guide is handy for the next step.
Final thoughts
Breeding mealworms is a practical, low‑cost way to support ant colonies when you keep humidity, hygiene and biosecurity in check. Use the feeding‑size table and the staggered harvest schedule above to plan, and keep a log — rhythm and cleanliness make it easy. If you’ve tried a particular berm of tubs or have a favourite gut‑load recipe, share it — hobbyists learn fastest from other keepers.
Hello, i read your blog from time to time and i own a similar one and i was just curious if you get a lot of spam responses? If so how do you protect against it, any plugin or anything you can advise? I get so much lately it’s driving me mad so any support is very much appreciated.